Views: 0 Author: Site Editor Publish Time: 2025-07-04 Origin: Site


You can put in a bathroom vanity by yourself and save a lot of money. Most people finish this job in one day. You can pick a plywood vanity, a floating style, or a cabinet style. There are choices for any bathroom size. Many people like double-sink vanities, built-in vanities, and freestanding styles. If you have the right tools, you can make your bathroom look better. It is like getting a new kitchen cabinet or wardrobe.
Collect all the tools and materials you need before you start. This helps you save time and work better. Turn off the water supply first. Take out the old vanity carefully. This stops leaks and keeps things from breaking. Measure your space the right way. Mark where the new vanity will go. This makes sure it fits well. Use shims to make the vanity level. Attach it tightly to the wall studs or anchors. This keeps it steady. Connect the plumbing so it is tight. Look for leaks. Seal the edges with silicone caulk. This keeps water out and makes it look neat.
Before you start, gather all your tools and materials. This helps you work faster and not run to the store. No matter what vanity you pick, you need most of the same tools.
You should have these tools ready:
Measuring tape: This helps you check if the vanity will fit.
Level: You use this to keep the vanity straight.
Drill and drill bits: These make holes for screws and pipes.
Adjustable wrench: This tool helps with water supply lines.
Pliers: These help you with tight plumbing parts.
Utility knife: You use this to cut old caulk or sealant.
Screwdriver set: You need both flathead and Phillips types.
Electronic stud finder: This tool finds wall studs for mounting.
Shims and wood spacer blocks: These help level the vanity.
Wall anchors: Use these if you can’t screw into a stud.
Caulking gun: You need this to put sealant around the vanity.
Tip: Good tools help you work better and finish faster.
Pick strong materials that last and look nice. Plywood is strong and does not get damaged by water. MDF works well for modern or wall mounted vanities. For the top, marble, granite, or solid surface are good choices. These are easy to clean and last a long time. Highend Home uses plywood that resists water and hardware that does not rust. If you install on tile, use special drill bits for tile so it does not crack.
Remember to get silicone caulk, stainless steel screws, and strong brackets for wall mounted vanities. If you want to help the planet, rubberwood is a good choice. It grows back and is better for the earth.
With the right tools and materials, installing your bathroom vanity is easier. Your bathroom will look as nice as a new kitchen cabinet or wardrobe from Highend Home.
Start by shutting off the water supply. Look for the valves under your sink and turn them clockwise until they stop. This step keeps water from leaking out when you disconnect the pipes. If you can’t find the valves, turn off the main water supply for your home. Open the faucet to let any leftover water drain out. Always wear gloves and safety glasses to protect yourself from splashes or sharp edges.
Tip: Place a bucket under the pipes to catch any water that might spill out.
Next, you need to disconnect the plumbing. Use an adjustable wrench to loosen the nuts on the water supply lines. Carefully pull the lines away from the faucet. Remove the P-trap (the curved pipe under the sink) by loosening the slip nuts. Some water will come out, so keep your bucket handy. Plug the open drain pipe with a rag or a cap to stop sewer gases from entering your bathroom. If your vanity has a double sink, repeat these steps for both sides.
Note: Take your time and keep track of all the parts you remove. This makes it easier when you install your new bathroom vanity.
Now you’re ready to remove a bathroom vanity from the wall or floor. Empty the cabinet and take out any drawers or shelves. Use a utility knife to cut through the caulk along the edges where the vanity meets the wall. Find and remove any screws or brackets holding the vanity in place. You might need a screwdriver or drill for this step. With help, gently lift the vanity away from the wall. If the vanity top is heavy, ask someone to help you lift it straight up.
After you move the old vanity, check the wall and floor for signs of water damage. Look for swollen wood, peeling veneer, or mold. Dry the area with a fan or a humidifier if needed. Sand down any rough spots and clean up mold with a safe cleaner. Fix any holes or gaps before you install your new vanity.
Removing your old bathroom vanity is a big step toward a fresh look. Highend Home offers a wide range of vanities, kitchen cabinets, and wardrobes to match your style. If you run into tricky plumbing or electrical issues, don’t hesitate to call a professional.
After you remove the old vanity, you need to get the space ready for your new bathroom vanity. Start by sweeping up dust and debris. Wipe down the walls and floor with a damp cloth. If you see any old caulk or glue, scrape it off with a putty knife. Check for water stains or mold. If you find any, clean them up right away. A clean area helps your vanity sit flat and keeps your bathroom looking fresh.
You want your bathroom vanity to fit perfectly. Grab your measuring tape and check the width, height, and depth of the open space. Here are some tips to help you choose the right size:
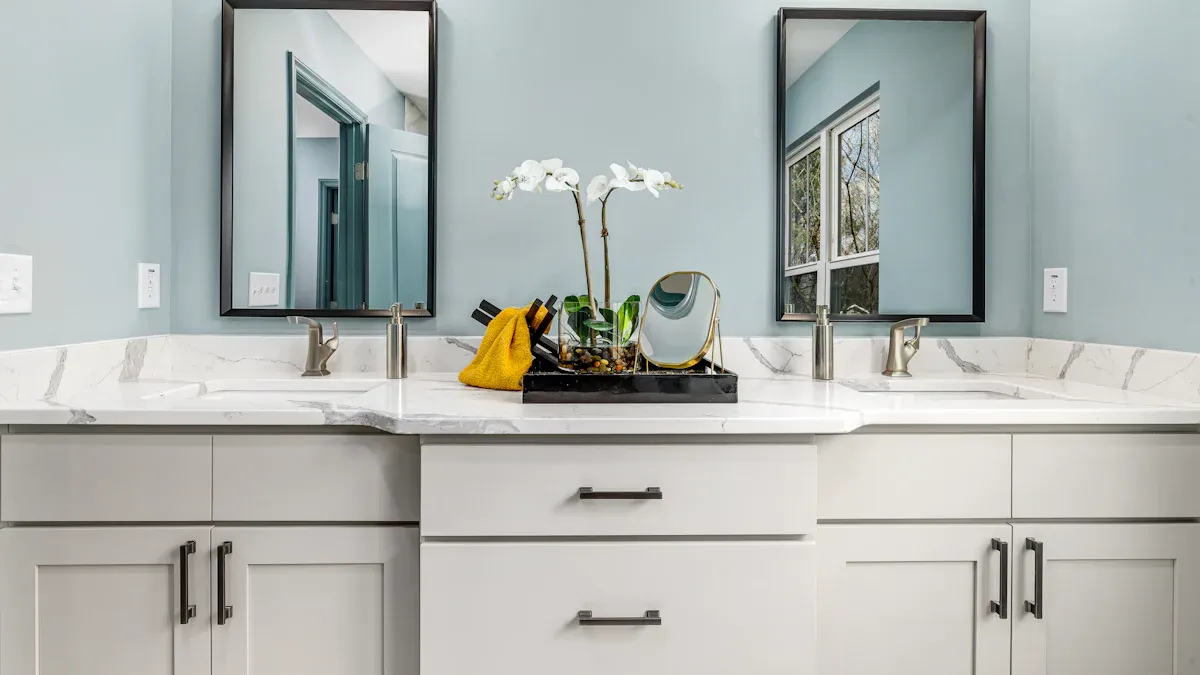
Master bathrooms usually fit larger vanities, from 60 to 72 inches wide. These often hold a double sink vanity.
Family bathrooms work well with medium sizes, like 36 or 48 inches wide.
Powder rooms need smaller vanities, around 16 to 24 inches wide.
Standard vanity heights range from 30 to 36 inches. Taller vanities (34-36 inches) are more comfortable for most adults.
Depth matters too. Smaller bathrooms need vanities about 18 inches deep. Bigger spaces can handle up to 24 inches.
Always measure the distance from the plumbing pipes to the floor and walls. Make sure your new bathroom vanity will not block any pipes or outlets.
Leave at least 15 inches from the toilet centerline and 24 inches in front for easy movement.
If you want a custom fit or have a unique space, Highend Home offers custom vanities. You can also match your vanity style with kitchen cabinets or a modern wardrobe for a unified look.
Once you pick your vanity, it’s time to mark where it will go. Follow these steps:
Slide the vanity into place and use shims to level it.
Lightly mark the top and sides on the wall with a pencil.
Remove the vanity and measure where the plumbing cutouts should be.
Mark the locations for water pipes and electrical outlets on the wall.
Transfer these marks to the back of the vanity, making sure they line up.
Use a stud finder to locate wall studs for secure mounting.
Tip: A Cabinet Plumbing Jig can help you mark plumbing and electrical spots quickly and accurately.
Planning ahead for plumbing and electrical connections saves time and prevents mistakes. When you finish marking, you’re ready to install your new bathroom vanity and enjoy a fresh, organized space.
Now you’re ready to install the new vanity. Start by moving your vanity into the marked spot. Make sure you have at least 30 inches of space in front so you can move around easily. Use a level to check if the vanity sits flat. If your floor is uneven, slide shims under the base until the bubble on the level is centered. For plywood vanities, 3/4" plywood boxes with hardwood face frames give you strength and durability. If you’re working with a wall-mounted vanity, you need to find the studs in the wall. Mark these spots so you can attach the brackets or backing boards for extra support.
Tip: Always double-check your measurements before you drill. This helps you avoid costly mistakes and makes sure your plumbing lines up with the vanity.
If you have a custom wood cabinet, you might notice it fits perfectly because it’s made just for your space. Prefabricated vanities may need a few adjustments, but you can still get a professional look by taking your time with leveling and placement.
Once your vanity is level, it’s time to attach to the wall. Use wood screws to anchor the vanity into the wall studs. If you can’t find a stud, mount a wood strip across the studs and screw the vanity into that. For drywall, heavy-duty anchors like toggle bolts or molly bolts work best. Avoid plastic anchors—they’re not strong enough for a bathroom vanity. If you’re installing on masonry or concrete, use expansion anchors made of galvanized steel.
Wall Type | Best Fastener | Notes |
|---|---|---|
Wood Studs | Wood Screws | Most secure for heavy vanities |
Drywall (no studs) | Toggle/Molly Bolts | Use heavy-duty anchors only |
Masonry/Concrete | Expansion Anchors | Galvanized steel for moisture areas |
For wall-mounted vanities, use heavy-duty brackets and make sure the backing board is secure. This keeps your vanity safe and steady, even with daily use. Adjustable leg levelers help with floor-standing units if your floor isn’t perfectly flat.
Note: Always check door and drawer clearance before you finish mounting. Open and close them to make sure nothing sticks.
Next, you need to secure the vanity top. Place the top on the cabinet and check the fit. If you see gaps, use shims to even things out. Apply a bead of 100% silicone caulk along the top edge of the cabinet before you set the vanity top in place. Press down gently so the silicone spreads and seals the joint. Wipe away any extra caulk with a damp rag.
If you want to install a vanity top made of marble, granite, or quartz, get someone to help you lift it. These tops are heavy and can crack if dropped. For plywood vanities, a solid surface top works well and is easy to clean.
Tip: Let the silicone cure for at least 24 hours before you use the sink. This keeps water from seeping under the top.
Now it’s time to attach a sink to a vanity and hook up the faucet and drain. Start by following these steps:
Place the faucet into the holes on the vanity top. Tighten the nuts from underneath by hand, then give them a quarter turn with a wrench.
Apply plumber’s putty or silicone around the drain opening. Insert the drain pipe into the hole and press down.
From below, add the rubber ring and plastic washer, then screw on the nut. Hand-tighten, then use pliers for a final snug fit.
Wipe away any extra putty or silicone that squeezes out.
Connect the tailpiece to the drain body with a slip nut.
Attach the P-trap to the tailpiece and the wall drain. Use plumber’s tape on threaded parts to prevent leaks.
If your sink has an overflow, line up the overflow hole and tighten the screw.
Install the pop-up stopper and connect the lift rod to the pivot rod.
Test the pop-up to make sure it moves smoothly.
After you finish installing a vanity, run water through the faucet and check for leaks. Tighten any loose connections if you see drips.
Highend Home’s bathroom vanities use water-resistant plywood and soft-closing hardware, so you get a long-lasting, quiet, and smooth experience. If you want a matching look, you can pair your new bathroom vanity with kitchen cabinets or a modern wardrobe from Highend Home. Customization options let you choose the perfect style and finish for your space.
Common mistakes include skipping the leveling step, using the wrong anchors, or not sealing the vanity top. Take your time and follow each step for a professional result.
You’re almost done! Now it’s time to reconnect the water supply and finish the bathroom vanity plumbing. Start by attaching the flexible water-supply tubes to the faucet’s tailpieces. Hand-tighten the coupling nuts, then use an adjustable wrench to give them a gentle quarter turn. Don’t over-tighten—just make sure they feel snug. Next, connect the supply tubes to the shut-off valves under the sink. If you see any old plumber’s tape, remove it and wrap new tape around the threads for a better seal.
Move on to the drain. Slide the drain arm into the drain stub-out at the wall. Use a washer and coupling nut to secure it. Apply plumber’s putty around the sink drain hole, then assemble the rubber gasket and drain pieces. Tighten the locknut to create a watertight seal. Fit the P-trap in place and hand-tighten the coupling nuts. Use slip-joint pliers to give them an extra quarter turn. If your pipes don’t line up perfectly, add a slip joint to reduce stress and prevent leaks. Keep the horizontal arm of the trap toward the back to maximize storage space inside your vanity.
Tip: If you want to make future maintenance easier, include a cleanout in your drain assembly.
Before you celebrate, you need to check for leaks. Turn on the shut-off valves slowly and watch for drips around every connection. Run water through the faucet and let it flow into the sink. Look under the vanity for any escaping water or pooling. Use a flashlight to inspect all joints and seams. If you spot a leak, tighten the connection just a bit more.
Here’s a quick checklist to help you test for leaks:
Visually inspect all fixtures, joints, and seams for water drops.
Run water through each fixture one at a time and watch for leaks.
Add a few drops of food coloring to the drain and check for colored water outside the pipes.
Wipe around connections with a dry paper towel to spot hidden drips.
Check the caulk and grout lines for any signs of moisture.
If you want extra peace of mind, place a water alarm near the vanity.
Note: If you find a leak you can’t fix, or if you notice moisture in the walls or floor, call a professional for help.
Sealing your new bathroom vanity is the final step for a professional look. Use a mold-resistant, waterproof silicone caulk to seal all seams between the vanity and the wall. Silicone caulk stays flexible, so it won’t crack as your bathroom changes temperature and humidity. Brands like GE Pro Seal Max Kitchen & Bath work well because they resist mold and mildew, stick to tile and metal, and cure quickly.
Before you apply caulk, clean the surfaces and remove any old caulk or dust. Cut the tip of the caulk tube at a 45-degree angle for a neat bead. Run a smooth line of caulk along the seam, then use a wet finger or a caulk tool to press it in and wipe away the excess. For larger gaps, use putty first, then caulk over it. Let the caulk cure for at least 24 hours before you use the sink.
Now it’s time to clean up. Wipe down the vanity with a soft, damp cloth to remove dust and fingerprints. For daily cleaning, use mild dish soap and warm water. Avoid harsh chemicals or abrasive sponges. Once a week, do a deeper clean with a gentle, non-abrasive cleaner. If you have a marble or quartz top, use the right cleaner to prevent stains. Check the cabinet hardware and tighten any loose screws. Wipe the area dry after each use to keep water spots away.
Pro Tip: Regularly inspect your caulk lines and touch up as needed. This keeps your bathroom vanity looking fresh and prevents water damage.
Highend Home offers after-sales support and professional advice if you have questions about installing a vanity or need help with custom wood cabinets, kitchen cabinets, or wardrobes. Their team can guide you through every step, from choosing the right materials to finishing touches. You can explore more bathroom vanity options and related products at Highend Home’s website.
You can install a new vanity with confidence. Just follow each step and double-check your work for a smooth finish. Here’s a quick checklist to help you get it right:
Measure your space and mark the vanity placement on the wall.
Use a level and shims to keep the vanity base even.
Secure the unit to wall studs with the right screws.
Connect plumbing lines tightly and check for leaks.
Apply silicone caulk along the edges for a watertight seal.
If you run into tricky plumbing or electrical work, reach out to a pro. Most projects are DIY-friendly, and you can pick from floating, freestanding, or custom styles. Highend Home offers after-sales support and a wide range of kitchen cabinets and wardrobes to match your new look.
Most people finish the job in about half a day. If you have experience with tools, you might work even faster. Plan for extra time if you need to move plumbing or add a double sink.
Yes, you can. If your new vanity matches the old one’s size and shape, you usually keep the plumbing in place. This makes the project easier and saves money.
Use shims under the vanity base to level it. Check with a level from side to side and front to back. This step helps doors and drawers open smoothly.
If you need to move outlets or add lighting, call a licensed electrician. For simple jobs, like plugging in a vanity light, you can do it yourself. Always turn off the power first.
You can explore Highend Home’s website for matching kitchen cabinets, wardrobes, and storage solutions. Custom options help you create a unified look in your home.


